搜尋
搜尋結果
搜尋AliOS Things ,
共找到 11 筆
- 排序
- 依時間
- 依熱門度

前瞻應用
學習
影片長度 - 2:41
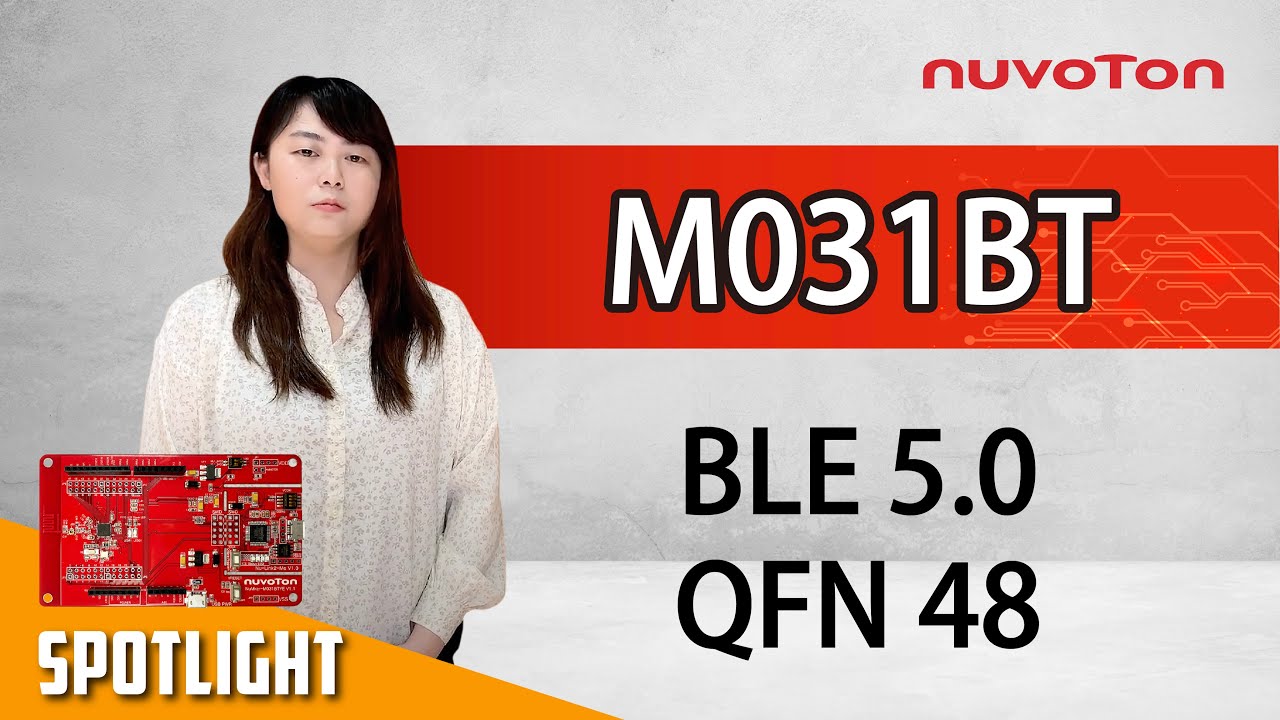
NuMicro® M031BT BLE 5.0 低功耗藍牙微控制器系列,以 Arm® Cortex®-M0 為核心,工作頻率高達 48 MHz,內建最高 128 KB Flash 和 16 KB SRAM,提供 BLE 5.0 和 2.4 GHz 雙模功能。相較於傳統集成簡單周邊的 BLE SoC,NuMicro® M031BT 系列內建豐富周邊與優異類比控制功能,實現一顆微控制器取代 BLE SoC 加控制晶片的方案,不僅大幅縮小 PCB 尺寸,QFN48封裝面積僅有 5mm x 5mm,也降低射頻佈局困難度,加上新唐參考設計方案與範例代碼,使得低功耗藍芽的應用開發變得相當容易。
NuMicro® M031BT 系列針對射頻應用提供高達 +8 dBm 的射頻發射功率、-94 dBm 的良好接收靈敏度、1 Mb/s 或 2 Mb/s 的傳輸速度,並且能在 2.4GHz 干擾嚴重的環境提供突出的抗噪表現,提升通訊距離和可靠性,滿足智慧家庭、消費電子以及工業物聯網等應用場景的需求。
NuMicro® M031BT 系列運作於 1.8V 至 3.6 V 工作電壓,內建 32 位硬體乘法器/除法器、高達 5 通道 PDMA、16 通道 12 位2 MSPS 高採樣率的 ADC 可運行在 1.8V 低電壓,提供精確且快速地效能表現,12 路 96 MHz PWM 可快速響應和精準的控制外部裝置。此外,M031BT 亦提供了豐富的周邊,例如 1 組 24 MHz SPI/I2S、3 組 6 MHz UART 並可支援單線式傳輸、2 組 I2C、1 組高彈性通用串行控制接口 (USCI) 可設為 UART, I2C 或 SPI。
NuMicro® M031BT 系列為了保護開發者的智慧財產權,內嵌一個額外的安全保護 Flash 區塊 (SPROM, Security Protection ROM),提供一個獨立且安全加密執行區域以保護關鍵程式代碼。記憶體鎖定功能 (Flash lock bits) 設計提供韌體防止外界存取或寫入保護。每一顆M031BT 具有一個 96 位元晶片唯一序號 (Unique Identification, UID) 及一個 128 位元唯一客戶序號 (Unique Customer Identification, UCID),大幅提升產品的保密與代碼安全性。
NuMicro® M031BT series: An low-power BLE 5.0 and 2.4GHz dual-mode microcontroller series by Arm® Cortex®-M0 core operating up to 48 MHz, with up to 128 KB Flash and 16 KB SRAM. In addition to the BLE 5.0 and 2.4GHz RF functions, the NuMicro® M031BT series built-in rich peripherals and analog control functions realize wireless connectivity. The 5mm x 5mm QFN48 package greatly reduces the PCB size and reduces RF layout difficulty. Furthermore, Nuvoton's reference design and rich sample code make the application development for low-power microcontroller with BLE/2.4G RF easier.
The NuMicro® M031BT series provides up to +8 dBm RF transmit power, a good receiving sensitivity of -94 dBm, 1 Mb/s, or 2 Mb/s transmission speed RF applications, and outstanding anti-noise performance in 2.4GHz interference environments to ensure communication distance and reliability. With these, the M031BT series are expected to meet the needs of application scenarios such as industrial Internet of Things (IIoT), smart home, consumer electronics, etc.
The NuMicro® M031BT series operates from 1.8V to 3.6V. It features a built-in 32-bit hardware divider, up to 5-channel PDMA, a 16-channel 12-bit 2 MSPS high sampling rate ADC that can run down to 1.8V low voltage, and 12-channel PWM running up to 96 MHz that can quickly respond and accurately control external devices. Besides, the M031BT also provides many peripherals such as one set of 24 MHz SPI/I2S, three sets of 6 MHz UART supporting single-wire transmission, two sets of I2C, and one set of highly flexible universal serial control interface (USCI) that can be configured as UART, I2C or SPI.
To protect the intellectual property rights, the NuMicro® M031BT series is embedded with an additional security protection Flash block (Security Protection ROM, SPROM) to provide an independent and secure encrypted execution area to protect critical program code. Flash lock bits are designed to provide firmware to prevent external access or write protection. There is a 96-bit unique chip identification (Unique Identification, UID) and a 128-bit unique customer identification (UCID) on each M031BT, which significantly improves product confidentiality and code security.
Nuvoton provides complete development tools, such as the NuMaker-M031BT evaluation board, software development kits, and sample codes, as well as free downloadable Keil MDK to speed up the end-product evaluation and development cycle.
#zh-Hant #Learning #Basic #Application
-
更多產品資訊,請至新唐科技網站 https://bit.ly/3hVdcmC
購買管道:https://direct.nuvoton.com/tw
聯絡我們:SalesSupport@nuvoton.com

前瞻應用
研討會
影片長度 - 24:22
Bringing Security to the IoT with PSA Certified
Jim Carver
Senior Business Development Manager, Arm Inc.
In this course you will learn how PSA Certified is transforming security in the Internet of Things. You will learn how PSA Certified can help protect your products and your company from bad actors by leveraging best security practices which are then evaluated by leading, independent security laboratories. You will also learn how PSA Certified products from Nuvoton can help you meet existing and emerging security standards and regulations.
Learn more about Nuvoton IoT Security platform: https://www.nuvoton.com/iotsecurity
Shop online: https://direct.nuvoton.com/
Contact us: SalesSupport@nuvoton.com
影片長度 - 2:41
NuMicro® M031BT BLE 5.0 低功耗藍牙微控制器系列,以 Arm® Cortex®-M0 為核心,工作頻率高達 48 MHz,內建最高 128 KB Flash 和 16 KB SRAM,提供 BLE 5.0 和 2.4 GHz 雙模功能。相較於傳統集成簡單周邊的 BLE SoC,NuMicro® M031BT 系列內建豐富周邊與優異類比控制功能,實現一顆微控制器取代 BLE SoC 加控制晶片的方案,不僅大幅縮小 PCB 尺寸,QFN48封裝面積僅有 5mm x 5mm,也降低射頻佈局困難度,加上新唐參考設計方案與範例代碼,使得低功耗藍芽的應用開發變得相當容易。
NuMicro® M031BT 系列針對射頻應用提供高達 +8 dBm 的射頻發射功率、-94 dBm 的良好接收靈敏度、1 Mb/s 或 2 Mb/s 的傳輸速度,並且能在 2.4GHz 干擾嚴重的環境提供突出的抗噪表現,提升通訊距離和可靠性,滿足智慧家庭、消費電子以及工業物聯網等應用場景的需求。
NuMicro® M031BT 系列運作於 1.8V 至 3.6 V 工作電壓,內建 32 位硬體乘法器/除法器、高達 5 通道 PDMA、16 通道 12 位2 MSPS 高採樣率的 ADC 可運行在 1.8V 低電壓,提供精確且快速地效能表現,12 路 96 MHz PWM 可快速響應和精準的控制外部裝置。此外,M031BT 亦提供了豐富的周邊,例如 1 組 24 MHz SPI/I2S、3 組 6 MHz UART 並可支援單線式傳輸、2 組 I2C、1 組高彈性通用串行控制接口 (USCI) 可設為 UART, I2C 或 SPI。
NuMicro® M031BT 系列為了保護開發者的智慧財產權,內嵌一個額外的安全保護 Flash 區塊 (SPROM, Security Protection ROM),提供一個獨立且安全加密執行區域以保護關鍵程式代碼。記憶體鎖定功能 (Flash lock bits) 設計提供韌體防止外界存取或寫入保護。每一顆M031BT 具有一個 96 位元晶片唯一序號 (Unique Identification, UID) 及一個 128 位元唯一客戶序號 (Unique Customer Identification, UCID),大幅提升產品的保密與代碼安全性。
NuMicro® M031BT series: An low-power BLE 5.0 and 2.4GHz dual-mode microcontroller series by Arm® Cortex®-M0 core operating up to 48 MHz, with up to 128 KB Flash and 16 KB SRAM. In addition to the BLE 5.0 and 2.4GHz RF functions, the NuMicro® M031BT series built-in rich peripherals and analog control functions realize wireless connectivity. The 5mm x 5mm QFN48 package greatly reduces the PCB size and reduces RF layout difficulty. Furthermore, Nuvoton's reference design and rich sample code make the application development for low-power microcontroller with BLE/2.4G RF easier.
The NuMicro® M031BT series provides up to +8 dBm RF transmit power, a good receiving sensitivity of -94 dBm, 1 Mb/s, or 2 Mb/s transmission speed RF applications, and outstanding anti-noise performance in 2.4GHz interference environments to ensure communication distance and reliability. With these, the M031BT series are expected to meet the needs of application scenarios such as industrial Internet of Things (IIoT), smart home, consumer electronics, etc.
The NuMicro® M031BT series operates from 1.8V to 3.6V. It features a built-in 32-bit hardware divider, up to 5-channel PDMA, a 16-channel 12-bit 2 MSPS high sampling rate ADC that can run down to 1.8V low voltage, and 12-channel PWM running up to 96 MHz that can quickly respond and accurately control external devices. Besides, the M031BT also provides many peripherals such as one set of 24 MHz SPI/I2S, three sets of 6 MHz UART supporting single-wire transmission, two sets of I2C, and one set of highly flexible universal serial control interface (USCI) that can be configured as UART, I2C or SPI.
To protect the intellectual property rights, the NuMicro® M031BT series is embedded with an additional security protection Flash block (Security Protection ROM, SPROM) to provide an independent and secure encrypted execution area to protect critical program code. Flash lock bits are designed to provide firmware to prevent external access or write protection. There is a 96-bit unique chip identification (Unique Identification, UID) and a 128-bit unique customer identification (UCID) on each M031BT, which significantly improves product confidentiality and code security.
Nuvoton provides complete development tools, such as the NuMaker-M031BT evaluation board, software development kits, and sample codes, as well as free downloadable Keil MDK to speed up the end-product evaluation and development cycle.
-
更多產品資訊,請至新唐科技網站 https://bit.ly/3hVdcmC
購買管道:https://direct.nuvoton.com/tw
聯絡我們:SalesSupport@nuvoton.com
培訓
工具
學習
影片長度 - 1:43
This video introduces how to download and install the Nu-Link Keil driver. The content includes how to download the Nu-Link Keil driver from the Nuvoton website, as well as the things you need to pay attention to during installation, so that you can use Arm Keil faster and smoother.
#Tool #Training #Learning #Intermediate #en
-
For more information, please visit Nuvoton Technology Website: https://bit.ly/3hVdcmC
Buy now: https://direct.nuvoton.com/numaker-m251sd
Contact us: SalesSupport@nuvoton.com

培訓
工具
學習
影片長度 - 8:57
Hello everyone, I am the principal engineer of Nuvoton Technology, Morgan. The development board we are using today is Nuvoton’s NuMaker-IoT-M487. It is powered by the NuMicro M487 microcontroller with Arm Cortex-M4 core, built-in RJ45 Ethernet, and Wi-Fi module allowing users to connect to clouds by wire or wirelessly. It supports several RTOS including Arm Mbed OS, Amazon FreeRTOS, and AliOS Things.
Today, I will show you how to use Mbed OS on the NuMaker-IoT-M487 development board.
First, open Chrome browser, enter the URL https://os.mbed.com to register an account if you don’t have one.
Move the mouse cursor to the human icon in the upper right corner then click “Log in or Sign up” or click “Sign up for free” directly.
Then click “Sign up”
Fill in your e-mail address and relevant information, and finally click Sign up. Check your mailbox to receive the certification letter and authorize it.
Then let’s log in to use the online compiler environment. Move to the human icon in the upper right corner, and then click “Log in or Sign up”. And enter your account and password. After a successful login, it will return to the first page and then click “Compiler” on the left side of the human icon. It will lead us to the online compiler web page.
The following demonstration is all operated on this page
Click “No device selected” in the upper right corner to add and select Nuvoton’s NuMaker-IoT-M487 development board.
It opens the “Select a Platform” page. We click the button, show “Add Board” with green “+”, in the lower-left corner.
Next, it shows the page, let us choose a board.
Scroll down to find NuMaker-IoT-M487, and click it. It opens the NuMaker-IoT-M487 board page (https://os.mbed.com/platforms/NUMAKER-IOT-M487/). Scroll down the page to find the button “+Add to your Mbed Compiler”, and click it.
Click “Compiler” on top of the page to return to the online compiler environment. If the “NuMaker-IoT-M487” small icon appears in the upper right corner, you can start to import a sample code. Otherwise, click “No device selected” again. At this time, you can see the NuMaker-IoT-M487 icon already in the “Select a Platform” dialog box, click the icon to select it and then click “Select Platform” in the upper right corner.
It returns to the online compiler page, and the “NuMaker-IoT-M487” icon shows in the top right corner. You can now start to import a sample code.
First, click “New” on the top left side, a small “Create new program” dialog box appears. The “Platform” selects “NuMaker-IoT-M487” automatically. In the “Template” field, please select “mbed OS Blinky HelloWorld” example code, click OK.
You can see the sample project has been loaded on the page, click “main.cpp” to show the source code. Let’s add a printf() function to print out a string in the main program.
Check if statements are correct, save it, and click “Compile” to build code.
Now it’s compiling, let’s wait for a moment.
And you can see a lot of messages at the bottom of the page. The last message is “Success!”
The browser will download the binary firmware file directly after a successful compiling. It will be saved in a default download folder or any folder based on your browser setting. In Chrome, you can click download file and select “Show in folder”.
Then we need to connect the NuMaker-IoT-M487 USB port to your computer and make sure the onboard LED lights up.
Let’s head back to the download folder where you can see the binary firmware file (mbed-os-example-blinky.NUMAKER_IOT_M487.bin). Drag and drop the file to NuMicro MCU drive.
You will see the copying progress dialog box. After the copy is completed, the firmware starts to execute. One LED on board starts blinking. To see the printout message, go on the following steps.
Please find the virtual COM port assigned for NuMaker-IoT-M487 in Device Manager. In the demonstration, the “Nu-Link Virtual Com Port” is COMx.
Then use your terminal tool of choice. Here we use Putty. Open the COMx port with 9600 baud rate, 8 bits, 1 stop bit, none parity, and no flow control settings.
You can see “Hello World!” printed in the terminal.
That’s all for this tutorial. Thank you for watching.
If you want to know more information, please contact us at SalesSupport@nuvoton.com
-
For more information, please visit Nuvoton Technology Website: https://bit.ly/3hVdcmC
Buy now: https://direct.nuvoton.com/tw/numaker-iot-m487
Contact us: SalesSupport@nuvoton.com
#Tool #Training #Learning #Intermediate #en

影片長度 - 4:56
具備豐富功能的 NuMaker IoT 物聯網開發平台,經過數種即時作業系統(RTOS)與雲端的認證。在這個影片裡,我們將介紹 NuMaker-IoT-M487 開發板,支援的即時作業系統和雲端,以及物聯網應用示範。
-
更多產品資訊,請至新唐科技網站 https://bit.ly/3hVdcmC
購買管道:https://direct.nuvoton.com/tw/
聯絡我們: SalesSupport@nuvoton.com

前瞻應用
學習
影片長度 - 3:48
The rich features of NuMaker IoT platforms have been certified by several RTOS and clouds. In this video, we introduce the NuMaker-IoT-M487 development board, supported OS and clouds, and an IoT demonstration.
#Application #Learning #Basic #en
-
For more information, please visit Nuvoton Technology Website: https://bit.ly/3hVdcmC
buy now: https://direct.nuvoton.com/tw/
contact us: SalesSupport@nuvoton.com

培訓
工具
學習
影片長度 - 5:15
以新唐 NuMaker-IoT-M487 與 AliOS Things 為平台進行開發,學習開發各式功能。觀看本片,您將學會如何以 AliOS Things 範例程式使用 Wi-Fi 連接阿里雲。
大家好,我是新唐工程師 Wayne,現在為您介紹新唐 IoT 系列課程主題 - 讓您了解如何在 AliOS Things 操作系統下使用 Wi-Fi 連接雲端。在這部影片中,我們將呈現編譯使用 Wi-Fi 連接雲端範例專案、可執行檔案的燒錄下載以及功能測試。如果您還沒有下載 AliOS-Things 軟體開發包,您可以觀看我們的另一部影片 - 開始使用 AliOS Things-控制 LED 與按鍵(AliOS Things篇),如果您也還沒有學會如何取得設備証書(設備三元組),也可觀看我們的另一部影片 - 學會使用 Ethernet 連接雲端(AliOS-Things與阿里雲篇)。
在 AliOS-Things 軟體開發包找到 numicro_aliyun_wifi Keil 專案檔案。它的路徑如下- projects\Keil\numicro_aliyun_wifi@numaker-iot-m487\keil_project
打開 Keil 專案檔,並打開 mqtt_example.c,將設備証書分別填入 PRODUCT_KEY 、 DEVICE_NAME 、 DEVICE_SECRET 常數定義。
然後,點擊 Rebuild 圖示編譯專案。
在編譯成功後,它將產生一個可執行檔案在 Objects 目錄內,
完整檔案路徑如下:projects\Keil\numicro_aliyun_wifi@numaker-iot-m487\keil_project\Objects,輸出的檔案名稱為numicro_aliyun@numaker-iot-m487.bin
接下來,我們開始進行可執行檔案的燒錄下載。
在這之前,我們先確認開發板上的 ISW1 開關元件,都切至 ON 的位置。
接著將 USB 線插上電腦,這時侯我的電腦出現一個 NuMicro MCU 磁碟機。我們回到可執行檔案存放的目錄,在可執行檔案numicro_aliyun@numaker-iot-m487.bin 上,按下滑鼠右鍵,傳送到 NuMicro MCU 磁碟機,然後畫面出現檔案傳輸視窗,等到傳輸完成後,
也結束燒錄下載流程。
我們開啟 Tera term 終端模擬連線工具,序列埠選擇 Nu-Link Virtual Com Port 編號 - COM4。其它的連接埠設定如畫面呈現。
在完成設定後,按下開發板上的 Reset 按鍵。
Tera term 將印出 AliOS-Things 的開機資訊並提供命令模式。
輸入以下指令 netmgr connect NT_ZY_BUFFALO 12345678
進行連結本地端 Wi-Fi 路由器(需具備網際網路連線功能的路由器)。
NT_ZY_BUFFALO 是本地端路由器的無線網路名稱,12345678 是它使用的加密金鑰,這兩個網路設定需要對應您的路由器設定。
在成功連接之後,範例程式也會連接上阿里雲雲服務器。
我們接著按下板子上 SW2 和 SW3 按鍵,在終端機上顯示按鍵被按下,
由於在範例程式同時訂閱與發佈同一個 Topic,所以按鍵被按下事件訊息被發佈到雲服務器後,也會收到從雲服務器發過來的相同訊息。
我們亦可在阿里雲 物聯網平台 頁面上,
查看從設備發佈的主題訊息。
點選左邊的 日誌服務 ,產品選擇 numicro_iot,
切換到 上行消息分析 分頁,在 MessageID 欄位這邊,
點選第一個數字連結,彈出一個小視窗,
內容選項選擇 Text(UTF-8) 後,
右邊的訊息顯示 SW3 pressed!,
代表雲服務器成功接收並儲存這個訊息至資料庫。
以上,是設備上行的測試; 我們接著進行下行至設備測試:
點選左邊的 設備,找到設備名稱 test_01,點選查看,切至 Topic列表 分頁,在 user/data 這個 Topic,點選 發佈消息,它彈跳出一個小視窗,我們在 消息內容 的欄位內,填入 LED*=OFF 字串,並點選 確認。
在按下 確認 後,板子的 3 顆 LED 燈就熄滅;再發佈 LED*=ON 訊息一次,板子的 3 顆 LED 燈就亮起。到這裡,我們完成了測試。
-
更多產品資訊,請至新唐科技網站 https://bit.ly/3hVdcmC
購買管道:https://direct.nuvoton.com/tw/numaker-iot-m487
聯絡我們: SalesSupport@nuvoton.com
#Tool #Training #Learning #Intermediate #zh-Hant

培訓
工具
學習
影片長度 - 7:49
以新唐 NuMaker-IoT-M487 與 AliOS Things 為平台進行開發,學習開發各式功能。觀看本片,您將學會如何以 AliOS Things 範例程式使用乙太網路連接阿里雲。
大家好,我是新唐工程師 Wayne,
現在為您介紹新唐 IoT 系列課程主題 -讓您了解如何在 AliOS Things 操作系統下使用 Ethernet 連接阿里雲。
在這部影片中,我們將呈現如何取得設備證書、如何編譯使用 Ethernet連接阿里雲專案、如何執行檔案的燒錄下載以及測試點亮LED 燈。
如果您還沒有下載 AliOS-Things 軟體開發包,您可以觀看我們的另一部影片 - 開始使用 AliOS Things-控制 LED 與按鍵 (AliOS Things篇)。
首先打開瀏覽器,並在網址列輸入阿里雲入口網址,網址如下 - http://iot.console.aliyun.com。連接。
瀏覽器畫面目前顯示的是 阿里雲登錄頁面。選擇 中國站-簡體中文 ,依照提示完成註冊。輸入申請的帳號與密碼後,點選登錄。成功登錄後,畫面目前顯示阿里雲個人首頁。找到個人控制台選項連結,點選。
畫面目前顯示阿里雲個人控制台,頁面列出已申請使用的雲服務。
找到物聯網平台選項連結,點選。畫面目前顯示物聯網服務的專屬控制頁面。點選頁面左邊的設備管理選項,再點選產品,然後點選創建產品,新增一個設備產品。產品名稱輸入 numicro_iot,並輸入以下設備產品相關資訊,這裡連網方式的選項 包含選擇 Wi-Fi、乙太網或是其它,取決於產品設備使用的通訊連網方式,我們選擇乙太網,然後點選完成,畫面即呈現設備產品建立完成,頁面上產生一筆記錄。我們在這筆記錄上,點選查看,並切換至 Topic 類列表,再點選 定義 Topic 類,在彈跳出來的小視窗內,Topic 類欄位輸入 data,並將設備操作權限改為發佈和訂閱,然後點選確定。接著我們點選頁面左邊的設備選項,再點選右邊的添加設備選項。然後,畫面彈跳出一個填寫設備資訊的視窗,接著在產品選項列表選擇剛剛我們新增的產品 - numicro_iot,並輸入設備名稱 - test_01,填入完成後,點選確認。接著畫面彈跳出該產品設備的三元組資訊。
點選 一鍵複製 ,把設備三元組資訊儲存在筆記本文件 內暫存。
在 AliOS-Things 軟體開發包找到 numicro_aliyun_ethernet keil 專案檔案。它的路徑如下-
projects\Keil\numicro_aliyun_ethernet@numaker-iot-m487\keil_project
打開 Keil 專案檔,並打開 mqtt_example.c,
將設備證書分別填入 PRODUCT_KEY, DEVICE_NAME, DEVICE_SECRET
常數定義。
然後,點擊 Rebuild 圖示編譯專案。在編譯成功後,它將產生一個可執行檔案在 Objects 目錄內,完整檔案路徑如下:
projects\Keil\numicro_aliyun_ethernet@numaker-iot-
m487\keil_project\Objects,輸出的檔案名稱為
numicro_aliyun_ethernet@numaker-iot-m487.bin
接下來,我們開始進行可執行檔案的燒錄下載,在這之前,我們先確認開發板上的 ISW1 開關元件,都切至 ON 的位置。 接著將 USB 線插上電腦。
這時侯我的電腦出現一個 NuMicro MCU 磁碟機。我們回到可執行檔案儲放的目錄,在可執行檔案 numicro_aliyun_ethernet@numaker-iot-m487.bin上,按下滑鼠右鍵,傳送到 NuMicro MCU 磁碟機,
然後畫面出現檔案傳輸視窗,等到傳輸完成後,也結束燒錄下載流程。
我們開啟 Tera term 終端模擬連線工具,序列埠選擇 Nu-Link Virtual Com Port 編號 - COM5。其它的連接埠設定如畫面呈現。如畫面設定。
在完成設定後,點選確定並按下開發板上的 Reset 按鍵。
Tera term 將印出 AliOS-Things 的開機資訊並提供命令模式。
我們接著將網路線接到具備網際網路連線功能的路由器上,
接上後,終端機顯示 plugged!! 100 full,代表乙太網路實體連接交握完成,這時,輸入 netmgr start 指令進行本地IP網路連接。在成功連接之後,範例程式也會連接上阿里雲。我們接著按下板子上 SW2 和 SW3 按鍵,由於在範例程式內,同時訂閱與發佈同一個 Topic ,在終端機上顯示按鍵被按下、按鍵被按下事件訊息被發佈到雲服務器後和
收到從雲服務器發過來的訊息。
我們亦可在阿里雲物聯網平台頁面上,查看從設備發佈的主題訊息。點選左邊的日誌服務,產品選擇numicro_iot,切換到上行消息分析分頁,在MessageID 欄位這邊第一個數字連結,彈出一個小視窗,內容選項選擇 Text(UTF-8) 後,右邊的訊息顯示 SW3 pressed!,代表雲服務器成功接收並儲存這個訊息至資料庫。
以上,是設備上行的測試; 我們接著進行下行至設備測試:
點選左邊的設備,找到設備名稱 test_01,點選查看,切至 Topic 列表分頁,在設 user/data 這個 Topic,點選發佈消息 ,它彈跳出一個小視窗,我們在消息內容的欄位上 ,填入 LED*=OFF 字串,並點選確認。在按下確認後,板子的 3 顆 LED 燈就熄滅; 再發佈LED*=ON 訊息一次,板子的 3 顆 LED 燈就亮起。到這裡,我們完成了測試。
-
更多產品資訊,請至新唐科技網站 https://bit.ly/3hVdcmC
購買管道:https://direct.nuvoton.com/tw/numaker-iot-m487
聯絡我們: SalesSupport@nuvoton.com
#Tool #Training #Learning #Intermediate #zh-Hant

培訓
工具
學習
影片長度 - 3:27
以新唐 NuMaker-IoT-M487 與 AliOS Things 為平台進行開發,學習開發各式功能。觀看本片,您將學會如何以 AliOS Things 範例程式讀取九軸感測器功能。
大家好,我是新唐工程師 Wayne,現在為您介紹新唐 IoT 系列課程主
題 - 讓您了解如何在 AliOS-Things 平台使用9軸感測器。在這部影
片中,我們將呈現讀取9軸感測器範例專案編譯、執行檔案的燒錄下
載以及功能測試。如果您還沒有下載 AliOS-Things 軟體開發包,您
可以觀看我們的另一部影片 - 新唐NuMaker-IoT-M487使用AliOS Things – 完成按鍵控制LED開關功能(1)。
在 AliOS-Things 軟體開發包找到 numicro_accelerometer_sensor keil 專案檔案。它的路徑如下-projects\Keil\numicro_accelerometer_sensor@numaker-iot-m487\keil_project
打開 Keil 專案檔,點擊 Rebuild 圖示編譯專案。
在編譯成功後,它將產生一個可執行檔案在 Objects 目錄內,完整
檔案路徑如下:projects\Keil\numicro_accelerometer_sensor@numaker-iot-
m487\keil_project\Objects
,輸出的檔案名稱為numicro_accelerometer_sensor@numaker-iot-m487.bin
接下來,我們開始進行可執行檔案的燒錄下載,在這之前,我們先
確認開發板上的 ISW1 開關元件,都切至 “ON”的位置。 接著將
USB 線插上電腦。這時侯我的電腦出現一個 NuMicro MCU 磁碟機
。磁碟機代號依不同電腦而不同,這台電腦是顯示為 G 槽。我們回
到可執行檔案儲放的目錄,在可執行檔案
numicro_accelerometer_sensor@numaker-iot-m487.bin上,按下滑鼠右鍵,傳送到 NuMicro MCU 磁碟機,然後畫面出現檔案傳輸視窗,等到傳輸完成後,也結束燒錄下載流程。
我們開啟 Tera term 終端模擬連線工具,序列埠選擇 Nuvoton
Virtual Com Port 編號 - COM30。其它的連接埠設定如畫面呈現。
如畫面設定。在完成設定後,點選確定並按下開發板上的 Reset 按
鍵。Tera term 將印出 AliOS-Things 的開機資訊與輸出 X, Y, Z 三
軸加速計值。這時侯您可搖晃開發板,並觀察X, Y, Z 三軸加速計值
的變化狀態。到這裡,我們完成了測試。
-
更多產品資訊,請至新唐科技網站 https://bit.ly/3hVdcmC
購買管道:https://direct.nuvoton.com/tw/numaker-iot-m487
聯絡我們: SalesSupport@nuvoton.com
#Tool #Training #Learning #Intermediate #zh-Hant

培訓
工具
學習
影片長度 - 4:16
以新唐 NuMaker-IoT-M487 與 AliOS Things 為平台進行開發,學習開發各式功能。觀看本片,您將學會如何以 AliOS Things 範例程式輸出 Hello World 與按鍵開關 LED 功能。
大家好,我是新唐工程師Wayne,現在為您介紹新唐 IoT 系列課程主題 - 讓您了解如何運行 AliOS-Things 操作系統。在這部影片中,我們將呈現如何下載 AliOS-Things 軟體開發包、AliOS-Things 範例專案編譯、執行檔案的燒錄下載以及功能測試。
首先打開瀏覽器,並在網址列輸入 AliOS-Things 原始碼倉庫網址,網址如下 - https://github.com/OpenNuvoton/AliOS-Things。連接。瀏覽器畫面目前顯示的是 AliOS-Things 軟體開發包,點選” Clone or download”按鍵,再點選 “Download ZIP”,電腦就開始下載AliOS-Things 軟體開發包了。
在完成下載 AliOS-Things 軟體開發包後,它是一個 zip 格式的檔案,需要進行解壓縮。
在 AliOS-Things 軟體開發包解壓縮完成後,找到numicro_button_led keil 專案檔案。它的路徑如下-projects\Keil\numicro_button_led@numaker-iot-m487\keil_project,打開Keil專案檔,點擊 Rebuild 圖示編譯專案。
在編譯成功後,它將產生一個可執行檔案在Objects目錄內,完整檔案路徑如下:projects\Keil\numicro_button_led@numaker-iot-m487\keil_project\Objects,輸出的檔案名稱為numicro_button_led@numaker-iot-m487.bin。
接下來,我們開始進行可執行檔案的燒錄下載,在這之前,我們先確認開發板上的 ISW1開關元件,都切至 “ON”的位置。 接著將USB 線插上電腦。這時侯我的電腦出現一個 NuMicro MCU 磁碟機。磁碟機代號依不同電腦而不同,這台電腦顯示為 G 槽。我們回到可執行檔案儲放的目錄,在可執行檔案numicro_button_led@numaker-iot-m487.bin上,按下滑鼠右鍵,傳送到 NuMicro MCU 磁碟機,然後畫面出現檔案傳輸視窗,等到傳輸完成後,也結束燒錄下載流程。
我們開啟 Tera term 終端模擬連線工具,序列埠選擇 Nuvoton Virtual Com Port 編號- COM5,其它的連接埠設定如畫面呈現。
在完成設定後,點選確定並按下開發板上的 Reset 按鍵。Tera term將印出 AliOS-Things 的開機資訊與每秒印出 hello world 的字樣,這時侯您可按下開發板上的 SW2 按鍵切換 LEDR 燈的狀態。到這裡,我們完成了測試。
-
更多產品資訊,請至新唐科技網站 https://bit.ly/3hVdcmC
購買管道:https://direct.nuvoton.com/tw/numaker-iot-m487
聯絡我們: SalesSupport@nuvoton.com
#Tool #Training #Learning #Intermediate #zh-Hant
 粤公网安备 44030502010001号